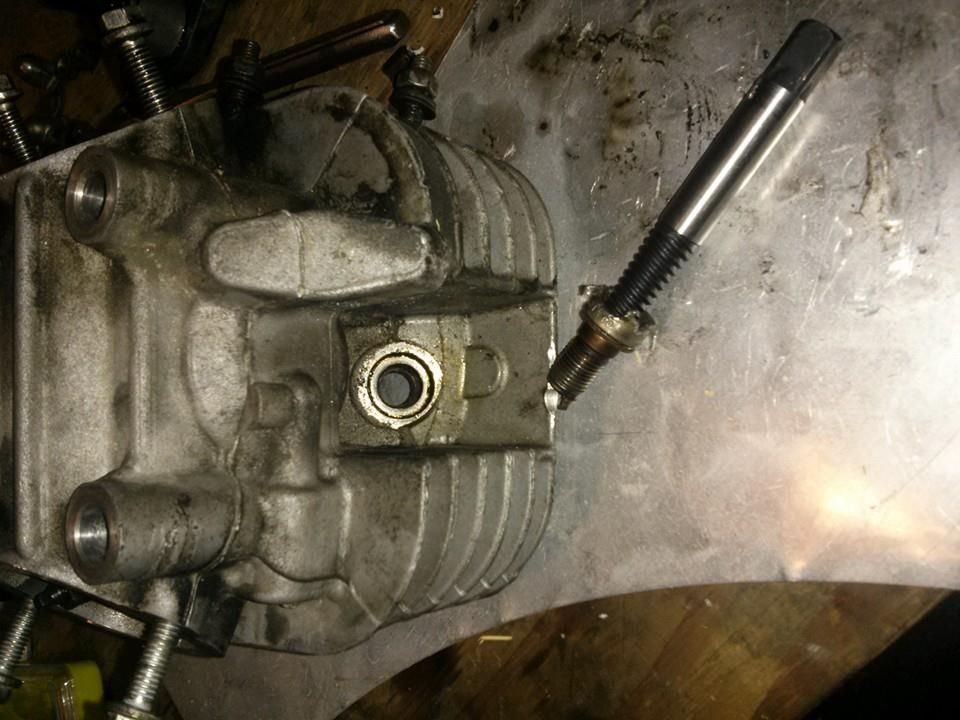
I swapped out my main jet to a 92 today and when I went to pull the plug to check it, the damn thing broke off just below the nut portion. The "shoulder" between the nut end and the threads is still thereand there is still some porcelain in the socket. Any ideas on how to extract this without removing the head? Some have suggested a regular screw type extractor but I am leery because of the porcelain that may break up and end up in the cylinder. Another has suggested heating the proverbial crap out of that part of the head and using a lubricant to help ease it out.
Hmmm...... it looks like enough of it is sticking out of hole. At least what I can tell from the pictures. Could you perhaps grab the left edge of it with a hefty set of vice grips, and maybe tap the side of the grips downwards with a mallet .... to sort of nudge the plug in a counter-clockwise direction? Maybe that would break it loose enough to more easily unscrew it.
I tried using some grips to pull it out be the clearance in there is *really* tight. I'm going to rummage around what's left of my wife's grandfather's tools in our basement and see what he had stashed away.
Another idea coming in from facebook was to file in a slot on the protruding shoulder bit and use an extra wide screwdriver to twist it out.
I'm still open to more suggestions before I break down and just pull the head off.
Before you remove the remnants of the plug, clean around it. In the picture, there seems to be a few metal shards, you don't want those getting into the cylinder.
Neurotic-Hapi-Snak wrote:Before you remove the remnants of the plug, clean around it. In the picture, there seems to be a few metal shards, you don't want those getting into the cylinder.
Those are some ceramic bits and I will assuredly make sure those are gone once I figure out something to do! Thanks!
Stilts wrote:Another idea coming in from facebook was to file in a slot on the protruding shoulder bit and use an extra wide screwdriver to twist it out.
That's an interesting idea - maybe you can get your hands on a dremmel with some sort of metal grinding bit.
I'm not sure if it's possible to take the head off without removing the motor. You have the timing chain going through there.
That's the big thing stopping me from just removing the head. I really don't want to drop the motor due to space considerations.
As long as there's enough inner plug for it to grab on to. Basically, they expand and grab the inner pipe when you turn it counter-clockwise. See if you can find one at a plumbing supply store.
As long as there's enough inner plug for it to grab on to. Basically, they expand and grab the inner pipe when you turn it counter-clockwise. See if you can find one at a plumbing supply store.
Update. Tried the wood bit idea and it just wasn't working. I'm still super leery of the easy out idea because of the ceramic bit still stuck in the shank. So, I got a buddy coming over this evening and we are going to just take the head off, which is, of course, the safest bet.
I just hope we can get it all back together properly.
There are a number of ways to try to get it out but it's not very tolerant of experimentation. You don't want to cross thread that! Pulling the head is probably the way to go.
Was it torqued too tight when it was originally put in? That can create pressure that will snap it when you try to take it out. I know this from my long history of snapping bolts. Ha.
Eric // LA Scooter Meetup Group // Stella 4T // Vespa LX // Vespa LXS // Honda Helix // some, uh, projects…
Anyone know the size of the engine to link bolt? I thought it was 21mm but that's not it and I'm not going back to the store until I know what size. Been there twice tonight already!
Plug is out! We did have to take the head off which was easier than we thought. Once the head was off, we cleared the ceramic out, squirted some PB Blaster and heated it up a bit, used a #5 Easy Out and BAM! Like butter.
I'm going to put a chain through this bit and wear it like a shark tooth.
The big test will be tonight once I put it back on the bike and hopefully we put it back together properly (ie, the timing system!).
Go to an auto parts store and get a tube of "anti-seize" and put some on the threads of you next spark plug as well as the threads of the cylinder & head studs. It will prevent seizing & galling, provide accurate torque readings .... will not promote unintentional loosening of nuts/ bolts/ or plugs.
fisher1 wrote:Go to an auto parts store and get a tube of "anti-seize" and put some on the threads of you next spark plug as well as the threads of the cylinder & head studs. It will prevent seizing & galling, provide accurate torque readings .... will not promote unintentional loosening of nuts/ bolts/ or plugs.